Setting Up Apache Kafka Locally Using Docker
A Beginner-Friendly Guide to Running Kafka on Your Machine
One of the biggest challenges beginners face while learning:
Apache Kafka
is:
Setting up Kafka correctly.
Historically, Kafka installation involved:
- Java setup
- Zookeeper configuration
- broker properties
- networking setup
- manual cluster management
This created significant friction for learners.
Fortunately, modern container technologies like:
Docker
have made Kafka setup dramatically simpler.
Using Docker, you can:
- start Kafka in minutes
- avoid manual installation complexity
- run isolated environments
- quickly reset configurations
- experiment safely
In this article, we will build a fully working local Kafka environment using Docker.
We will cover:
- Docker basics
- Kafka container setup
- KRaft mode
- Docker Compose
- creating topics
- producing messages
- consuming messages
- understanding the local architecture
By the end, you will have a working Kafka environment ready for hands-on learning.
Why Use Docker for Kafka?
Kafka is a distributed system.
Even a local setup involves:
- brokers
- networking
- storage
- metadata management
Docker simplifies all of this.
Benefits of Docker-Based Kafka Setup
Using Docker provides:
- fast setup
- isolated environments
- reproducibility
- easier cleanup
- portability
- simplified networking
This is why Docker has become the preferred approach for local Kafka learning.
What We Will Build
We will create:
Local Machine
   ↓
Docker Engine
   ↓
Kafka Container
The Kafka broker will run locally and expose ports for:
- producers
- consumers
- CLI tools
Prerequisites
Before proceeding, install:
1. Docker Desktop
Install:
Docker Desktop
Available for:
- Windows
- macOS
- Linux
2. Verify Docker Installation
Run:
docker --version
Expected output:
Docker version xx.x.x
Understanding Kafka in KRaft Mode
Modern Kafka versions support:
KRaft mode.
This removes the need for:
Apache ZooKeeper
which historically complicated setup.
Benefits:
- simpler architecture
- fewer containers
- easier local development
We will use:
Kafka in KRaft mode.
Why KRaft is Better for Learning
KRaft reduces:
- operational complexity
- configuration overhead
- infrastructure requirements
Perfect for:
- local labs
- tutorials
- experimentation
- beginner learning
Creating the Project Folder
Create a directory:
mkdir kafka-local
cd kafka-local
This folder will contain:
- Docker Compose file
- Kafka data
- optional helper scripts
What is Docker Compose?
Docker Compose
allows us to define containers declaratively.
Instead of manually running long Docker commands, we define infrastructure using YAML.
Create docker-compose.yml
Inside the project folder, create:
docker-compose.yml
Kafka Docker Compose Configuration
Add the following:
version: '3.8'

services:
  kafka:
    image: apache/kafka:latest
    container_name: kafka
    ports:
      - "9092:9092"
    environment:
      KAFKA_NODE_ID: 1
      KAFKA_PROCESS_ROLES: broker,controller
      KAFKA_LISTENERS: PLAINTEXT://:9092,CONTROLLER://:9093
      KAFKA_ADVERTISED_LISTENERS: PLAINTEXT://localhost:9092
      KAFKA_CONTROLLER_LISTENER_NAMES: CONTROLLER
      KAFKA_LISTENER_SECURITY_PROTOCOL_MAP: CONTROLLER:PLAINTEXT,PLAINTEXT:PLAINTEXT
      KAFKA_CONTROLLER_QUORUM_VOTERS: 1@localhost:9093
      KAFKA_OFFSETS_TOPIC_REPLICATION_FACTOR: 1
Understanding the Configuration
This configuration:
- starts Kafka in KRaft mode
- exposes broker on port 9092
- configures controller quorum
- enables local development access
Important Kafka Settings Explained
KAFKA_NODE_ID
KAFKA_NODE_ID: 1
Uniquely identifies the broker node.
KAFKA_PROCESS_ROLES
KAFKA_PROCESS_ROLES: broker,controller
This node acts as:
- broker
- metadata controller
Suitable for local setups.
KAFKA_LISTENERS
KAFKA_LISTENERS
Defines broker communication endpoints.
KAFKA_ADVERTISED_LISTENERS
KAFKA_ADVERTISED_LISTENERS
Defines how clients connect to Kafka.
KAFKA_CONTROLLER_QUORUM_VOTERS
Defines controller quorum participants for KRaft metadata coordination.
Starting Kafka
Run:
docker compose up -d
Expected output:
Creating kafka ... done
Kafka container now starts in background.
Verify Running Containers
Run:
docker ps
Expected output:
CONTAINER ID   IMAGE
kafka          apache/kafka
Viewing Kafka Logs
To inspect logs:
docker logs -f kafka
Look for messages like:
Kafka Server started
This confirms broker startup.
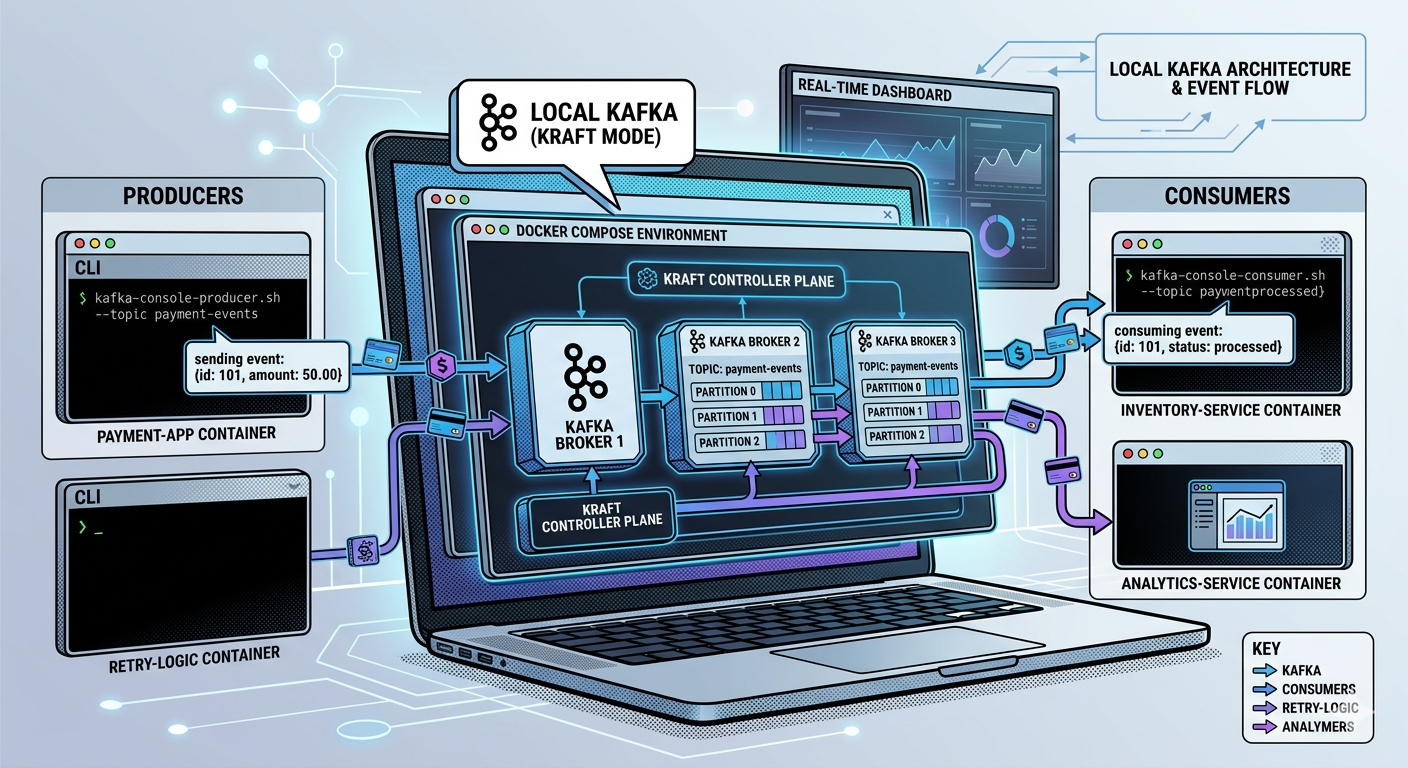
Understanding the Local Kafka Architecture
Your local environment now contains:
Producer Apps
      ↓
localhost:9092
      ↓
Kafka Broker Container
Applications connect using:
localhost:9092
Entering the Kafka Container
To run Kafka CLI commands:
docker exec -it kafka bash
You are now inside the container shell.
Kafka CLI Tools
Kafka ships with powerful CLI utilities.
Examples:
- topic management
- producers
- consumers
- metadata inspection
These are excellent for learning Kafka internals.
Creating Your First Kafka Topic
Inside container:
kafka-topics.sh \
  --create \
  --topic payments \
  --bootstrap-server localhost:9092
What This Command Does
This command:
- creates topic named payments
- registers metadata
- allocates partitions
Kafka now has a topic ready for events.
Listing Topics
Run:
kafka-topics.sh \
  --list \
  --bootstrap-server localhost:9092
Expected output:
payments
Describing the Topic
Run:
kafka-topics.sh \
  --describe \
  --topic payments \
  --bootstrap-server localhost:9092
You will see:
- partition count
- replication factor
- leader broker
- replica assignments
Producing Messages
Start producer:
kafka-console-producer.sh \
  --topic payments \
  --bootstrap-server localhost:9092
Now type messages:
PaymentCompleted
PaymentRefunded
FraudDetected
Each line becomes a Kafka event.
Understanding What Happened
Producer:
- connected to broker
- sent records to payments topic
- Kafka appended them into partition logs
You are now actively using Kafka.
Consuming Messages
Open another terminal.
Enter container again:
docker exec -it kafka bash
Run consumer:
kafka-console-consumer.sh \
  --topic payments \
  --from-beginning \
  --bootstrap-server localhost:9092
Expected output:
PaymentCompleted
PaymentRefunded
FraudDetected
What Happened Internally
Consumer:
- connected to broker
- requested records from topic
- read events sequentially
- processed from earliest offset
This demonstrates Kafka’s:
- append-only log model
- durable event storage
Understanding –from-beginning
This flag tells Kafka:
Read all available historical messages
Without it:
- consumer reads only new incoming events
Kafka Stores Events Persistently
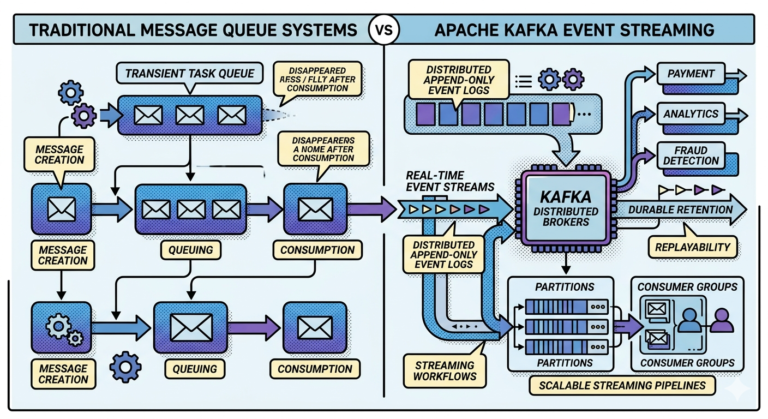
Unlike traditional queues:
- Kafka retains events after consumption
Consumers can:
- replay history
- restart processing
- recover from failures
This is one of Kafka’s biggest strengths.
Stopping Kafka
To stop containers:
docker compose down
Kafka shuts down cleanly.
Removing Kafka Data Completely
To remove volumes:
docker compose down -v
This deletes:
- topics
- offsets
- stored events
Useful for clean resets.
Common Beginner Issues
Issue 1 — Port Already in Use
Error:
Port 9092 already allocated
Solution:
- stop existing Kafka
- change exposed port
Issue 2 — Docker Not Running
Error:
Cannot connect to Docker daemon
Solution:
- start Docker Desktop
Issue 3 — Kafka Container Exits
Check logs:
docker logs kafka
Most issues involve:
- invalid environment variables
- port conflicts
Why Learning Kafka CLI Matters
Many engineers skip CLI tools and jump directly into frameworks.
This is a mistake.
CLI tools help understand:
- topics
- partitions
- offsets
- message flow
- broker behavior
They are invaluable for debugging.
Moving Beyond Local Setup
Once comfortable locally, you can explore:
- multi-broker clusters
- replication
- Kafka Connect
- Kafka Streams
- monitoring
- security
- Kubernetes deployments
But every advanced Kafka engineer starts with:
A simple local broker.
Real-World Developer Workflow
Many teams use Docker-based Kafka environments for:
- local development
- integration testing
- CI/CD pipelines
- experimentation
- training labs
Docker has become standard practice for Kafka learning.
Common Beginner Misconceptions
Misconception 1
Kafka requires Zookeeper
Modern Kafka supports KRaft mode.
Misconception 2
Kafka setup is extremely difficult
Docker simplifies local setup dramatically.
Misconception 3
Kafka deletes messages after consumption
Kafka retains messages durably.
Misconception 4
Consumers receive messages automatically
Consumers actively poll Kafka.
Why This Setup Matters
This local environment helps you:
- experiment safely
- understand Kafka internals
- practice producer/consumer workflows
- learn partition behavior
- explore event streaming concepts
Hands-on experimentation is essential for mastering Kafka.
Key Takeaways
Using:
Docker
and:
Docker Compose
makes local Kafka setup fast and beginner-friendly.
Modern Kafka supports:
- KRaft mode
- simplified deployment
- no external Zookeeper dependency
With a simple Docker Compose file, you can:
- run Kafka locally
- create topics
- produce events
- consume messages
- experiment with event-driven systems
This local setup forms the foundation for all upcoming Kafka hands-on exercises and architectural exploration using:
Apache Kafka